Top tips for sewing a better bag for beginners and those looking to up their game.
Whether you are just sewing bags for yourself, your friends or you are sewing them to sell, there are several easy ways to ensure that you sew the best bag you can. When you are starting out you may not know them all. Here are my basic tips for sewing a better bag.
Several factors contribute towards a better bag, including a combination of good design, quality materials, and skilled sewing techniques.
Design:
Unless you are sewing a new pattern that you just want to practice, most bag making projects start with the question: Who are you sewing it for? Sometimes you see a pattern and realise immediately that it is just perfect for your mother and hey, her birthday is only two weeks away. 😊
On the other hand, if you are sewing to sell at a specific market you will need an understanding of what type of bag will sell well there. A good bag is not only well made, but one that fits the purpose.
Read more about selling the bags that you sew.
6 Steps To Turning Your Passion For Sewing Handmade Bags Into A BusinessFabric:
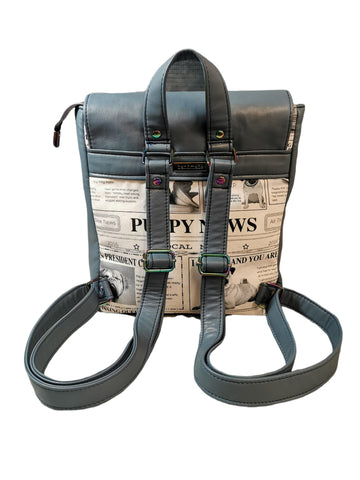
Choose the right fabric for the bag design. Virtually all bag sewing patterns will tell you the type of fabric required, so don’t go too rogue on that. An evening clutch may be perfect sewn from beaded satin, but a backpack or market tote requires a more sturdy and durable fabric that can withstand wear and tear such as canvas, denim, or vinyl.
Other bag styles may be more flexible, a handbag, depending on the pattern, may be great in cotton, canvas or vinyl.
Stitching and thread:
- Backstitch at the beginning and end of each seam to reinforce it or tie off your thread ends well if the back stitching is going to spoil the look of the bag.
- Sew a second line of stitching just inside the seam allowance in areas that may need more reinforcement, such as strap attachments, bag bottoms etc.
- Check your thread tension and use the correct stitch length for your project. Seams should have a shorter stitch length to ensure that they are strong and won’t come apart easily, most people use a stitch length of 2.5 to 3. Top stitching should be longer as it is usually visible. The longer length of 3 – 4 gives a neater finished look and also helps if you are sewing through thicker fabrics.
- Use the correct needle for your fabric and thread. This helps avoid, broken needles, skipped stitches and fraying thread. Read more here.
- Choose the correct thread for your project and your machine. Multi-purpose polyester thread is strong, UV resistant and works well on most domestic machines. You could also consider changing to a top-stitching thread for the topstitching that shows.
- For an industrial machine choose bonded nylon or bonded polyester thread.
- Fusible interfacing gives the fabric more structure and stability. As well as adding body, it will make your fabric pieces easier to sew and prevent them from stretching or distorting.
- Stabilizers such as fleece and foam and Decovil are especially helpful for bags that need to hold their shape. Again, refer to the pattern instructions.
- Use stabilizers to reinforce areas that will undergo more stress, such as the handles or the bottom of the bag. Decovil is also great for reinforcing areas where you attach magnetic snaps or badges etc. I keep a box of offcut scraps handy just for this. Read my blog to find out more about how to use Decovil.
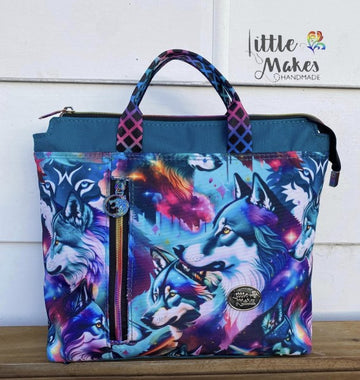
Use good quality hardware:
It’s all in the details. Not only does it make your finished bag look beautiful and professional, but it will add durability to the design and perceived added value.
Add a detachable cross body strap with D rings and swivel snap hooks or use rivets to reinforce areas and add a bit of bling, or make a feature of your zippers by matching them to your hardware.
For an outdoor backpack that may be out in the rain a lot consider nylon hardware instead.

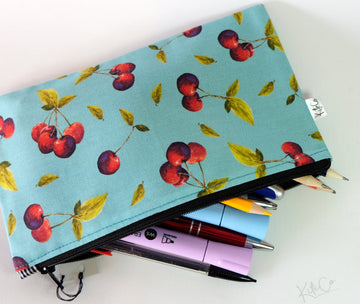
Incorporate pockets:
Adding pockets to a bag not only helps to keep items organized but also make the finished bag much more appealing. Investigating pockets in a new bag is like unwrapping Christmas presents, you want to open them to see inside!
And it's easy, It is not too much work to add a zipper pocket to the interior of a lined tote or even a slip pocket if the tote is unlined.
Adding pockets really helps to personalise the design. Handbags and backpacks etc. have endless pocket opportunities 😊
Test the pattern or your design:
If you’re using your own design, obviously make a prototype out of scrap fabric before cutting your final bag to test the design and make any necessary adjustments. This can help you avoid mistakes and ensure that your final bag is the best it can be.
If you are planning to batch sew, make one bag all the way through first, that way when you sew your batch you will avoid having to unpick all of them if you go wrong. (Ask me how I know that! Ha ha).
Remember, nothing beats practice. If something goes wrong, you will learn from it.
Happy Sewing!
Katey
Are you enjoying our blog? Sign up for updates, subscriber only offers and more.